Getting Started with Stet
Stet takes a finished .docx manuscript and turns it into a publish-ready book. The whole process takes about ten minutes.
The short version:
- Prep your
.docx— apply Word's Heading 1 style to every chapter title. - Import. Stet detects your structure and applies typography automatically.
- Confirm the chapter structure. A two-step checklist walks you through it.
- Pick a template, preview, export. Done.
Prep your manuscript
You'll save yourself the most time here. The single most important step is below; the rest are nice-to-haves.
Do this — apply Heading 1 to every chapter title
In Word, click each chapter title and apply the Heading 1 style from the Styles panel on the Home tab. Stet reads heading styles from your document, so this is how it knows where one chapter ends and the next begins.
If your "headings" are just bold text or a larger font size, Stet has fallbacks (it'll detect Chapter One, Prologue, all-caps lines, etc.) — but Heading 1 is by far the most reliable.
Helpful — use a recognisable scene break
Mark scene breaks in your .docx with one of these patterns on a line by itself: ***, * * *, ---, - - -, or #. Stet replaces them with whatever ornament the template prescribes (and you can override the choice). Image-based dividers and blank lines aren't recognised.
Helpful — name your front and back matter
Stet auto-classifies sections by title. Calling your dedication page "Dedication" rather than something idiosyncratic will save a manual classification step. The same goes for Copyright, Foreword, About the Author, Acknowledgements, and similar standard sections.
Avoid
- Decorative chapter headings. ~ Chapter Three ~ confuses chapter-number detection. Use a clean title and let the template add the decoration.
- Manual first-paragraph indentation. Stet sets indentation based on the template — manual spacing in Word will fight it.
- Mixed heading levels for chapters. Use Heading 1 consistently. Heading 2 is for sub-sections within a chapter.
- Embedded covers. Stet doesn't import or export covers — they're handled separately by your distributor's tooling.
For deeper prep guidance — including how front matter, back matter, and Word paragraph styles map to roles in Stet — see Preparing Your Manuscript.
Step 1: Import
Open Stet. On the welcome screen, drag your .docx onto the window or click New Book and choose your file.
Stet reads your manuscript and builds a structured book project: chapters, front matter, and back matter are detected automatically, and bold, italic, and footnotes are preserved. A few corrections are applied silently as part of import:
- Stray whitespace and double spaces are cleaned up.
- First-paragraph indentation rules are set per the template.
- Smart quotes, em dashes, and ellipses are applied based on your book's Writing Conventions — dash style (em-tight, en-spaced, em-spaced, etc.), ellipsis style (single character or spaced), and double-space normalisation. You can change these from Book Details at any time and Stet will reapply.
Your original file is never modified. Stet works from a copy stored inside your
.stetproject file. You can re-import any time.
Step 2: The Publishing Checklist
The first time you open a manuscript, Stet shows a short two-step checklist:
- Your manuscript is in. Confirm Stet has detected your chapter structure correctly.
- You're ready to format. Review any remaining warnings, then go to the template picker.
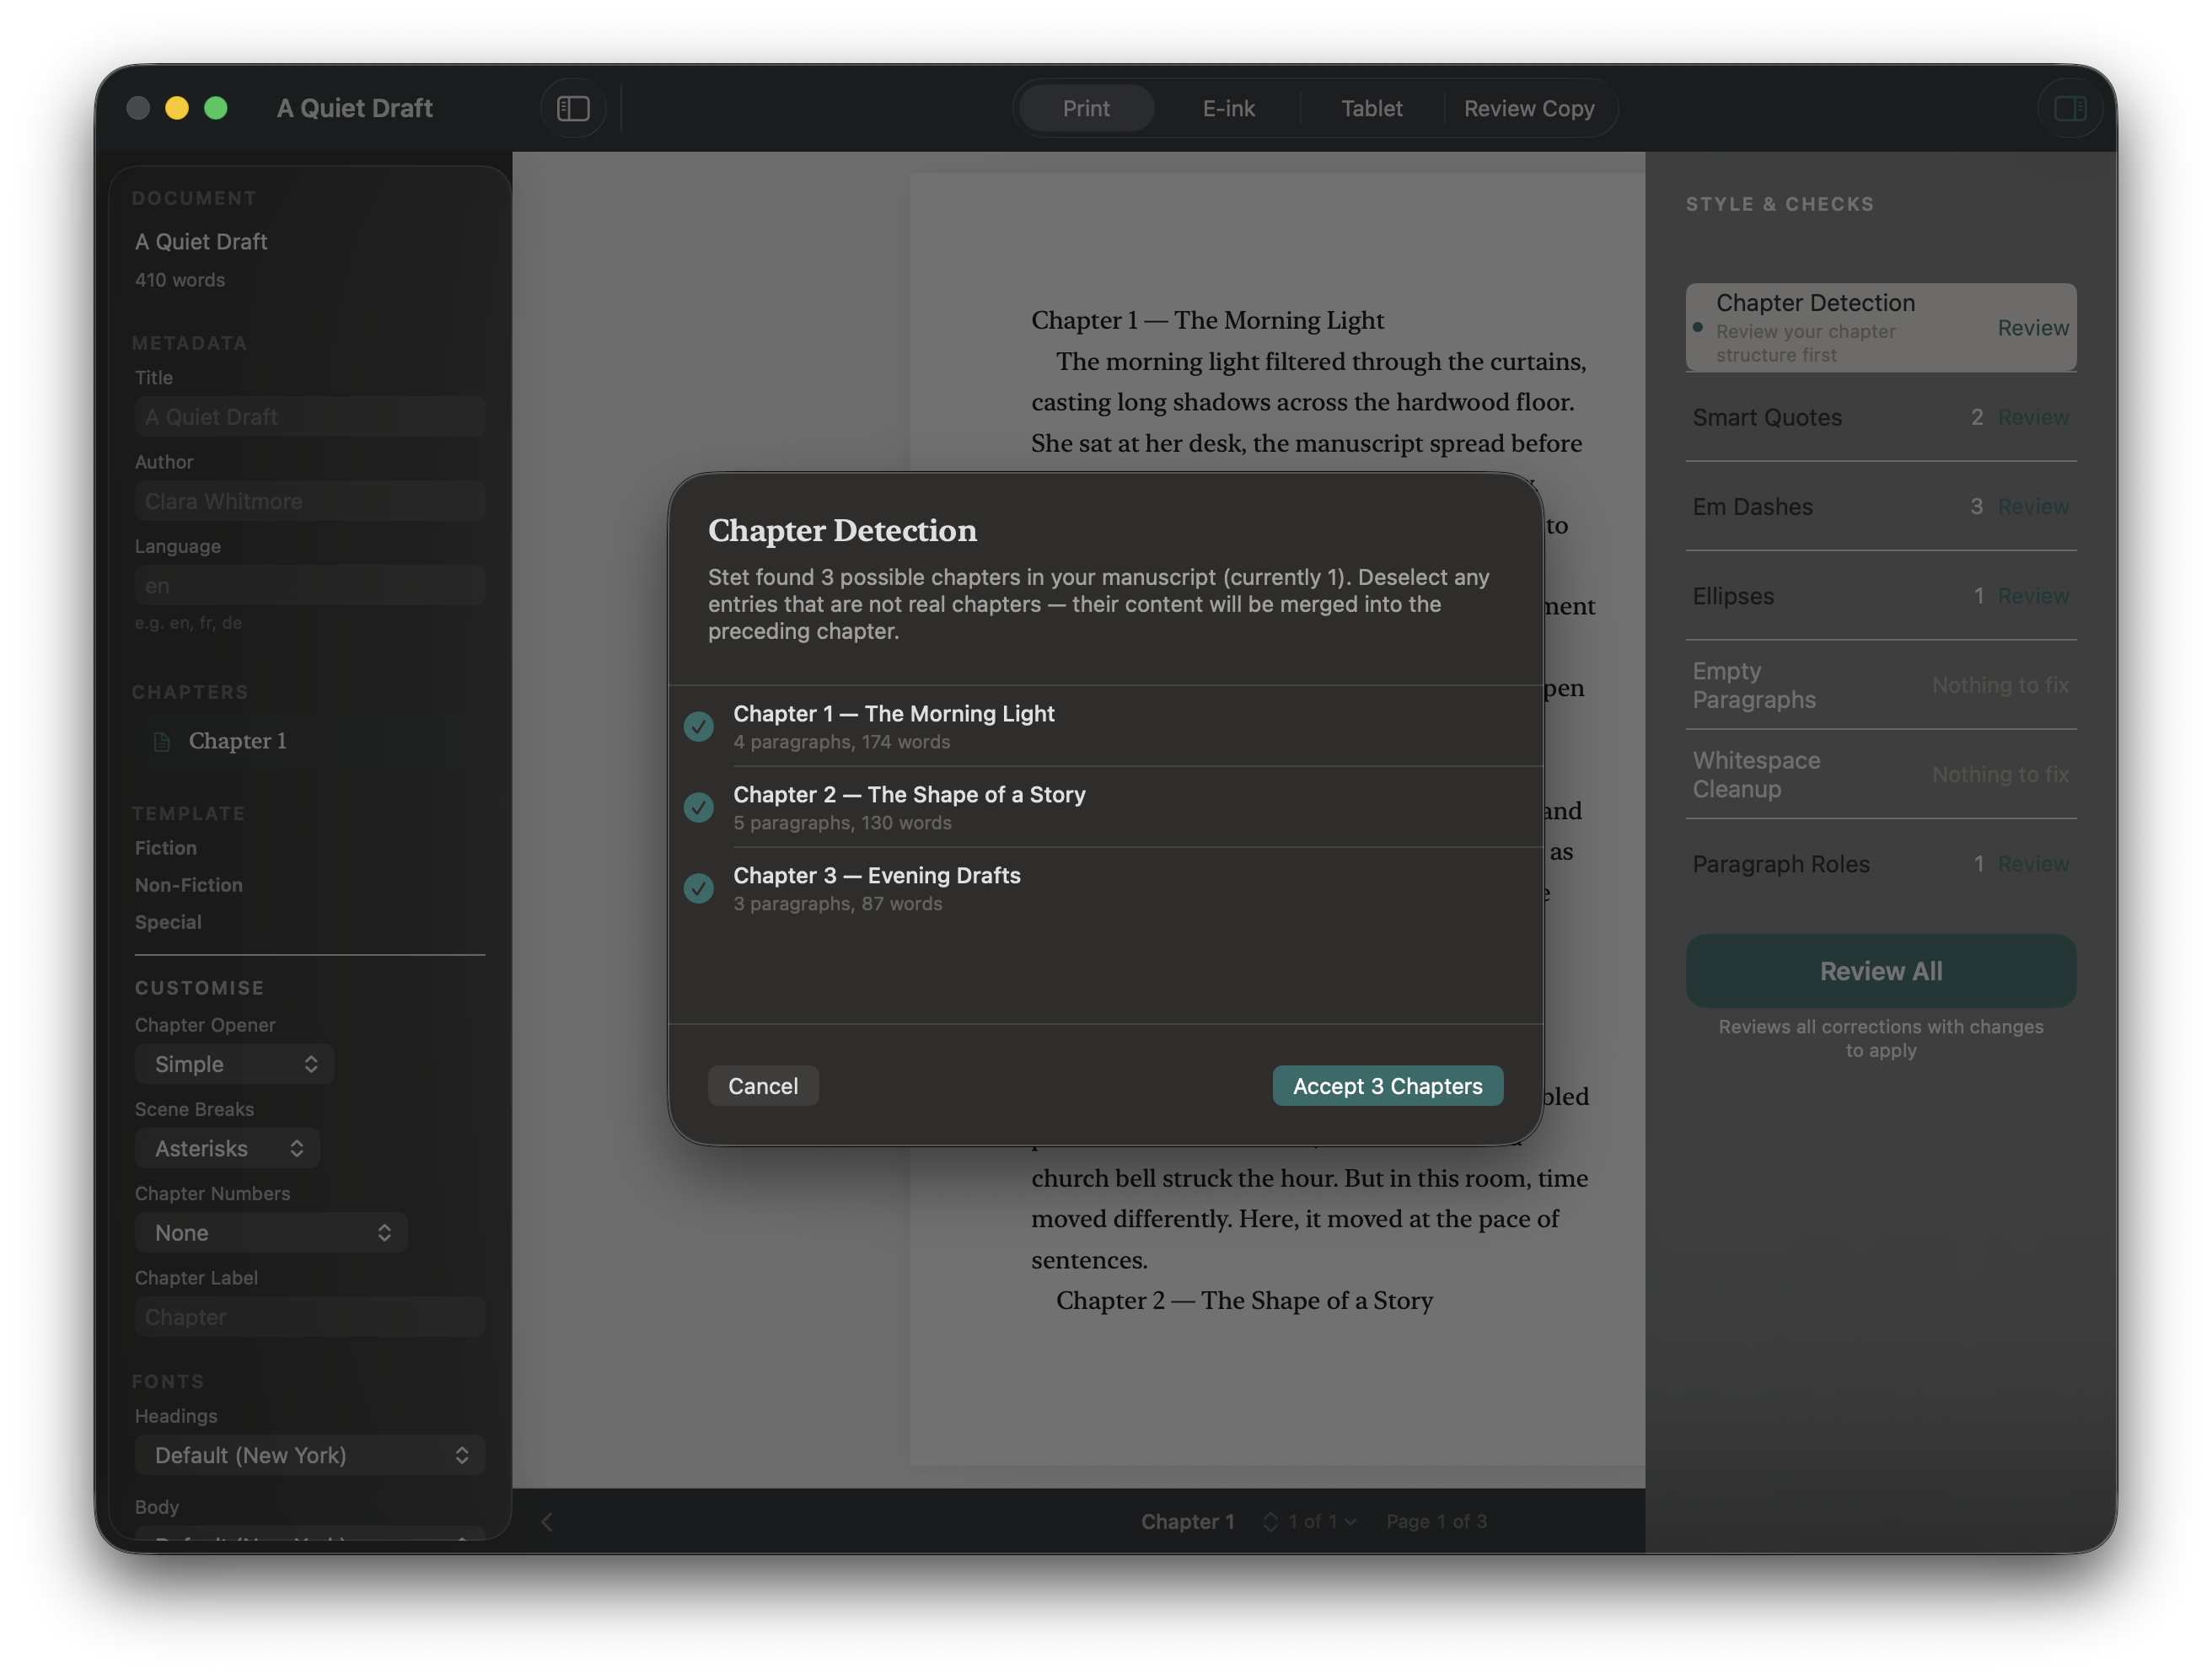
If your manuscript starts cleanly with a chapter heading and Stet is confident about every detection, the checklist may skip straight to "Ready to format." Each step has a Skip for now option and is also available from the sidebar at any time.
If Stet finds content before your first chapter that it couldn't classify automatically (a title page, dedication, etc.), it'll ask "What is this?" for each item before opening the book. Pick the type that fits, or choose Include in first chapter if you're unsure — you can reclassify later by right-clicking in the sidebar.
Step 3: Look at the checks panel
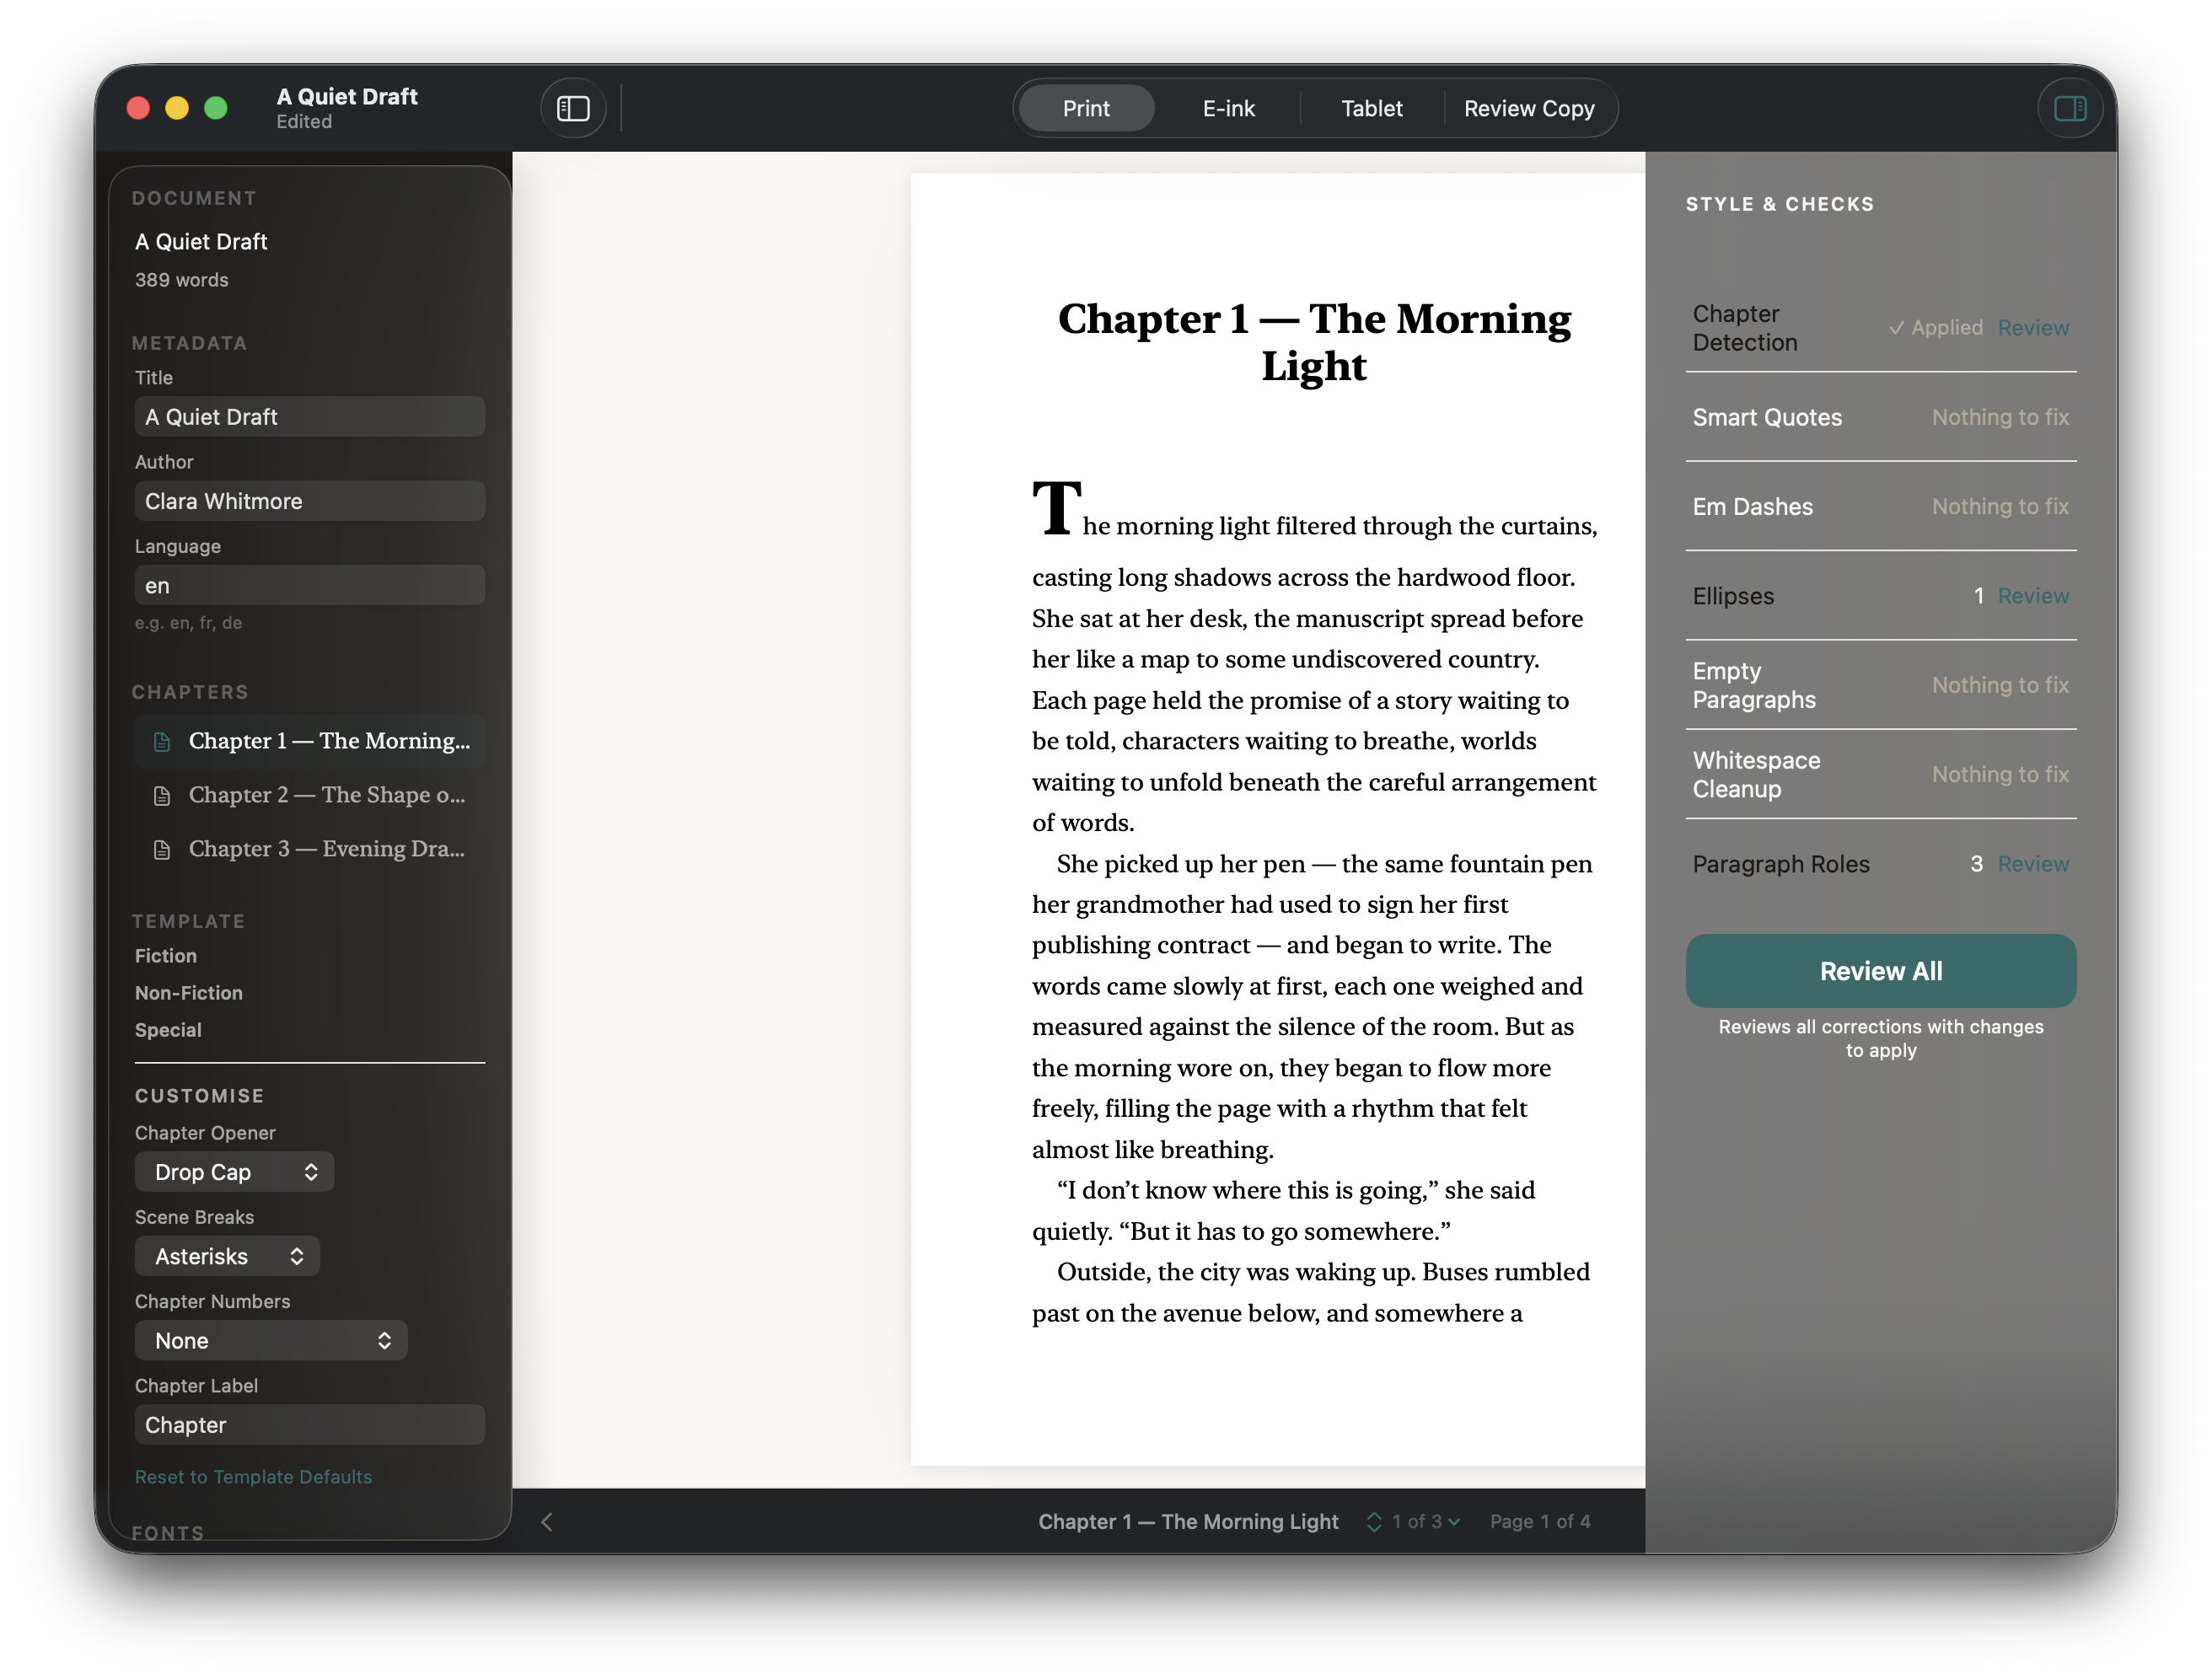
The Style & Checks panel on the right shows anything Stet thinks might need attention. The typography corrections are already applied; what remains here is structural and advisory:
- Short / long / orphaned chapters — possible missing chapter breaks.
- Copyright missing, ISBN format, Back matter missing — required or expected sections.
- Inconsistent scene breaks, wall of text — formatting that hints at a source-document issue.
- Layout warnings — minimum page count, gutter width, image alt text.
A check showing Nothing to fix means your manuscript is clean for that item. Click the × next to a check to dismiss it (you can always restore it later).
Every change is undoable with ⌘Z.
Step 4: Choose a template and trim size
In the left sidebar:
Template controls the visual style of your book. Templates are grouped by genre. Click a group (Fiction, Non-Fiction, Memoir & Essay, Poetry, Special) to expand it. Click any template to apply it — the preview updates immediately. Hover for a one-line description.
Style (below the template picker) lets you customise the selected template — scene break, chapter number style, chapter opener layout, page numbering, and more. Tweak anything that doesn't suit your book. A small dot appears next to the template name when you've made changes; Reset to template defaults restores the original settings.
Trim Size is the physical size of your printed book. Stet ships with 19 trim sizes audited against KDP's current supported list. Pick one that matches your distributor's requirements.
Fonts — click the font name next to Chapter Headings or Body Text to swap typefaces. Stet ships with a curated set of open-licence fonts that are safe to embed; you can also import your own.
If you import a font, only use one you are licensed to embed in published files.
Right-click any chapter or section in the sidebar to reclassify it, change its type, or remove it from the book.
Step 5: Preview
The centre panel shows a live preview. Use the tabs at the top to switch between:
- Print PDF — exact replica of your print interior, with running headers and page numbers
- Kindle / Kobo — e-ink reader rendering
- iPad / Fire — tablet rendering
- Review PDF — A4 layout for ARCs, NetGalley, and beta readers
Navigate with the ‹ › arrows, or click the chapter list to jump. The preview updates immediately when you change anything.
Step 6: Export
When you're happy:
- EPUB — File → Export EPUB for Store (Kindle, Apple Books, Kobo). Use Export All (⌘⇧⌥E) to write one EPUB per store in a single folder.
- Print PDF — File → Export as Print PDF. Upload directly to KDP Print or IngramSpark.
- Review Copy PDF — File → Export as Review Copy PDF for ARCs and beta readers.
Finder opens automatically when an export finishes.
Tips
Chapters not detected correctly? Heading styles probably weren't applied in Word. Apply Heading 1 to your chapter titles and re-import — or use the Chapter Detection correction in Stet to mark headings manually after import.
Front matter out of order? The standard order is Half-title, Title page, Copyright, Dedication, Epigraph, Table of Contents, Foreword, Preface. Stet flags deviations as a warning, not an error.
Kindle is ignoring my custom font. Expected. Kindle uses its own font rendering and overrides custom fonts in all ebooks, regardless of the tool that produced them. Apple Books and Kobo will honour your choice.
Something looks off in print preview. Check that the trim size matches your intended print size, and try switching templates — some are better suited to certain genres.
A section is the wrong type. Right-click it in the sidebar and choose Change Type.
Keyboard shortcuts
| Action | Shortcut |
|---|---|
| Previous chapter | ⌘[ |
| Next chapter | ⌘] |
| Export EPUB | ⌘⇧E |
| Export all EPUB stores | ⌘⇧⌥E |
| Find | ⌘F |
| Find and Replace | ⌘H |
| Next match | ⌘G |
| Toggle inspector | ⌥⌘I |
| Double-click page | Edit chapter |
| ⌘Return (in editor) | Save chapter |
| Undo | ⌘Z |
More reading
- Preparing Your Manuscript — deeper guidance on .docx structure, paragraph styles, and what Stet auto-detects.
- Templates & Fonts — choosing and customising the look of your book.
- Checks — what Stet looks for and why.
- FAQ.